Mention teammates in your Check-ins
Directly notify and connect specific team members to your work shared in Check-in items
Have a specific Check-in item you want to ensure a specific teammate sees? That’s what our mentions feature is for.
With mentions, you can directly notify and connect teammates to any work items shared in your daily Check-ins.
Here’s a quick overview of how the feature works.
Using mentions
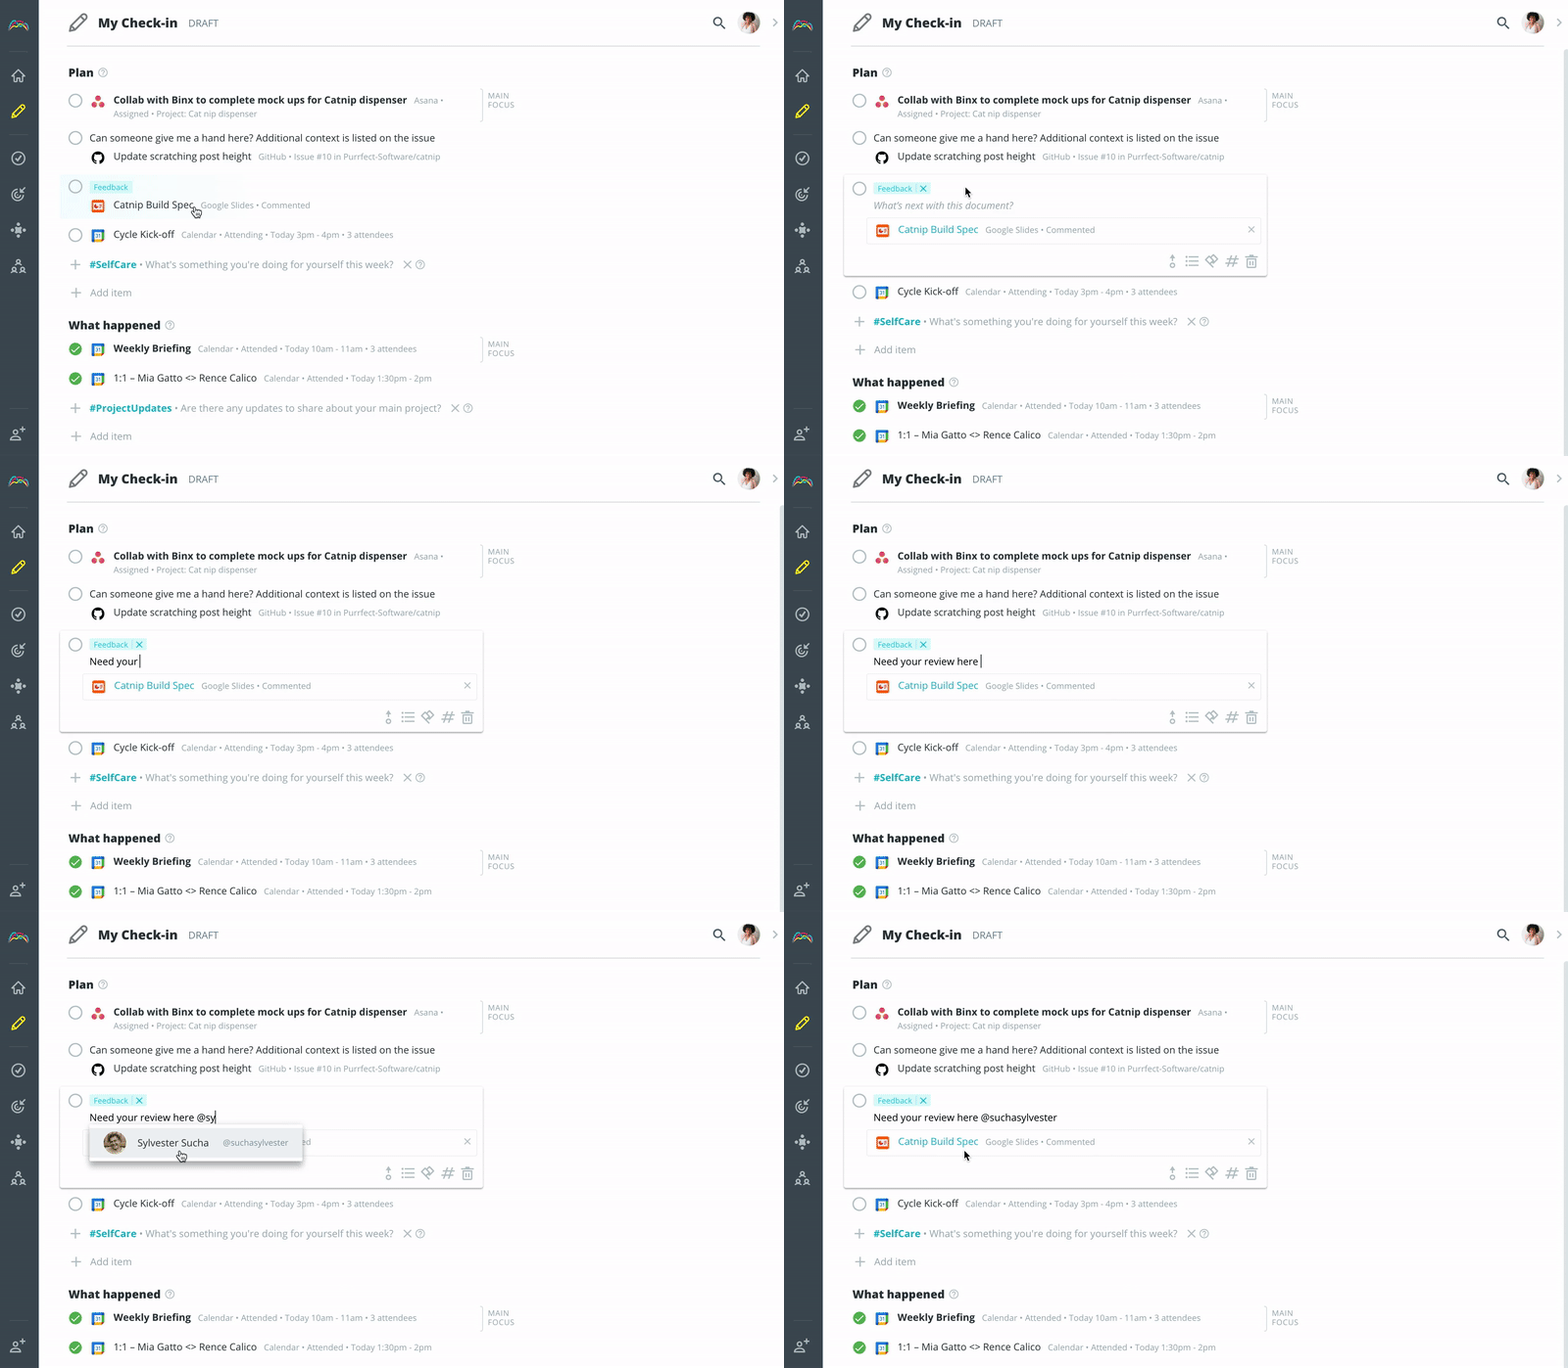
Tagging a teammate
Mentioning a teammate — tagging them in your Check-in items — is simple and easy. Type @ and a dropdown menu of all your teammates will appear. Here, you’ll see your teammates’ full names and display names. To tag a teammate, you can type their display name or part of their full name.
Can I tag multiple teammates? Yes, you sure can! After adding the first teammate, just type @ to add and mention the others.
Managing notifications
Like all of the notifications you receive from Range, you’ll want to head to the Notifications screen under Settings (https://range.co) in Range and scroll to “New mentions” to manage notifications from mentions.
You have three channel options for where you want to be notified when a teammate mentions you:
-
Email
-
Slack
-
Desktop
Select each of the ways in which you want to be notified; you can select all channels or none.
Configuring your display name
Your display name is the name your team members will enter to mention you in a Check-in item. If my teammates wanted to mention me in an update, they’d type @michael.
Note: Display names can only contain lowercase letters (a-z), numbers (0-9), and underscores (_).
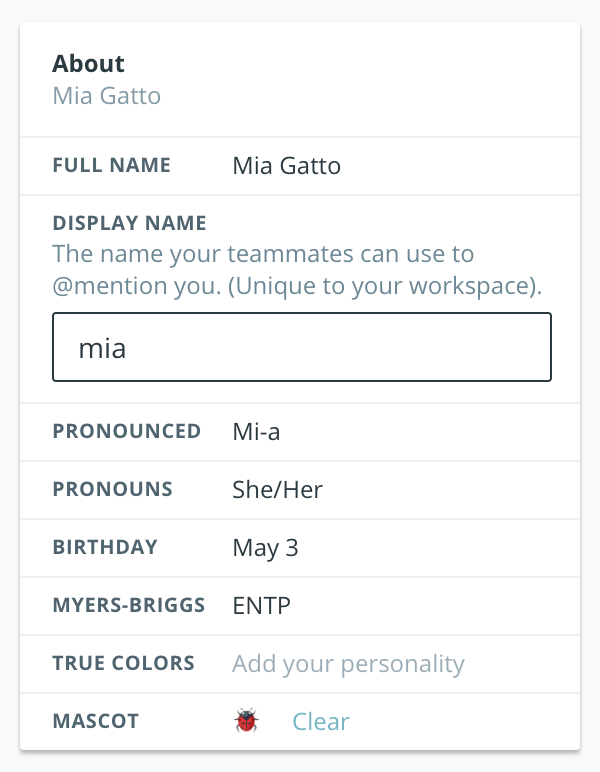
While you can choose anything to be your display name, we recommend that you choose a name that your teammates already associate with you. Suggestions include your first name (if not already used by a teammate), first name and last initial, and first initial and last name.
There are a couple of places where you’ll be able to set this up:
-
When first setting up your Range account
-
On your Range user profile under the Handbook tab