Add and assign action items in Meetings
Create and assign tasks created during meetings to teammates
Since team meetings are designed to move work forward, they often result in follow-up tasks and projects. That’s why we created the action items functionality in our Meetings product.
As you and your team move through your meeting agenda, you can create and assign action items to individuals or the whole team. These tasks will then show up in your Check-in sidebar so you can easily include them in your plans for the day.
Here’s how it works.
How to add and assign action items
Once you’ve clicked the “Start session” button in a Range meeting agenda, you and your teammates will be able to add and assign action items to each other.
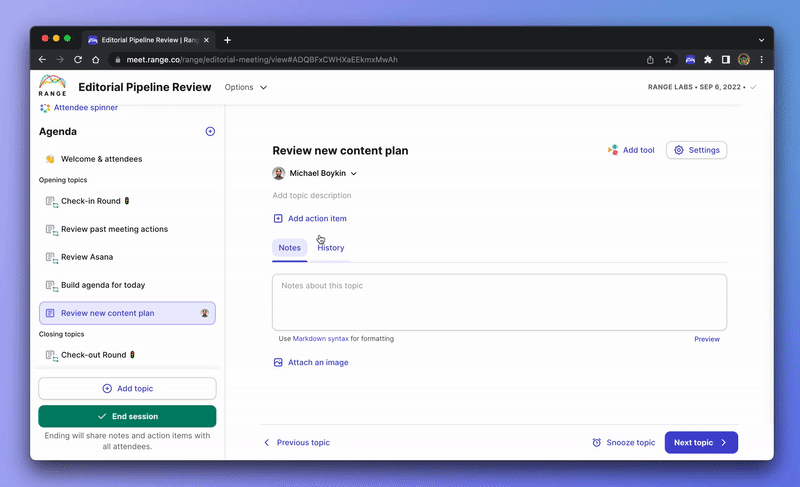
To add an action item, you just need to:
-
Click + Add action item
-
Enter a description
-
Assign it to a team member
-
Click Add action
That’s it!
Tip: If instead of assigning an action item to an individual you want to assign it to everyone attending the meeting, you can select All attendees from the dropdown menu when assigning the task.
Managing action items
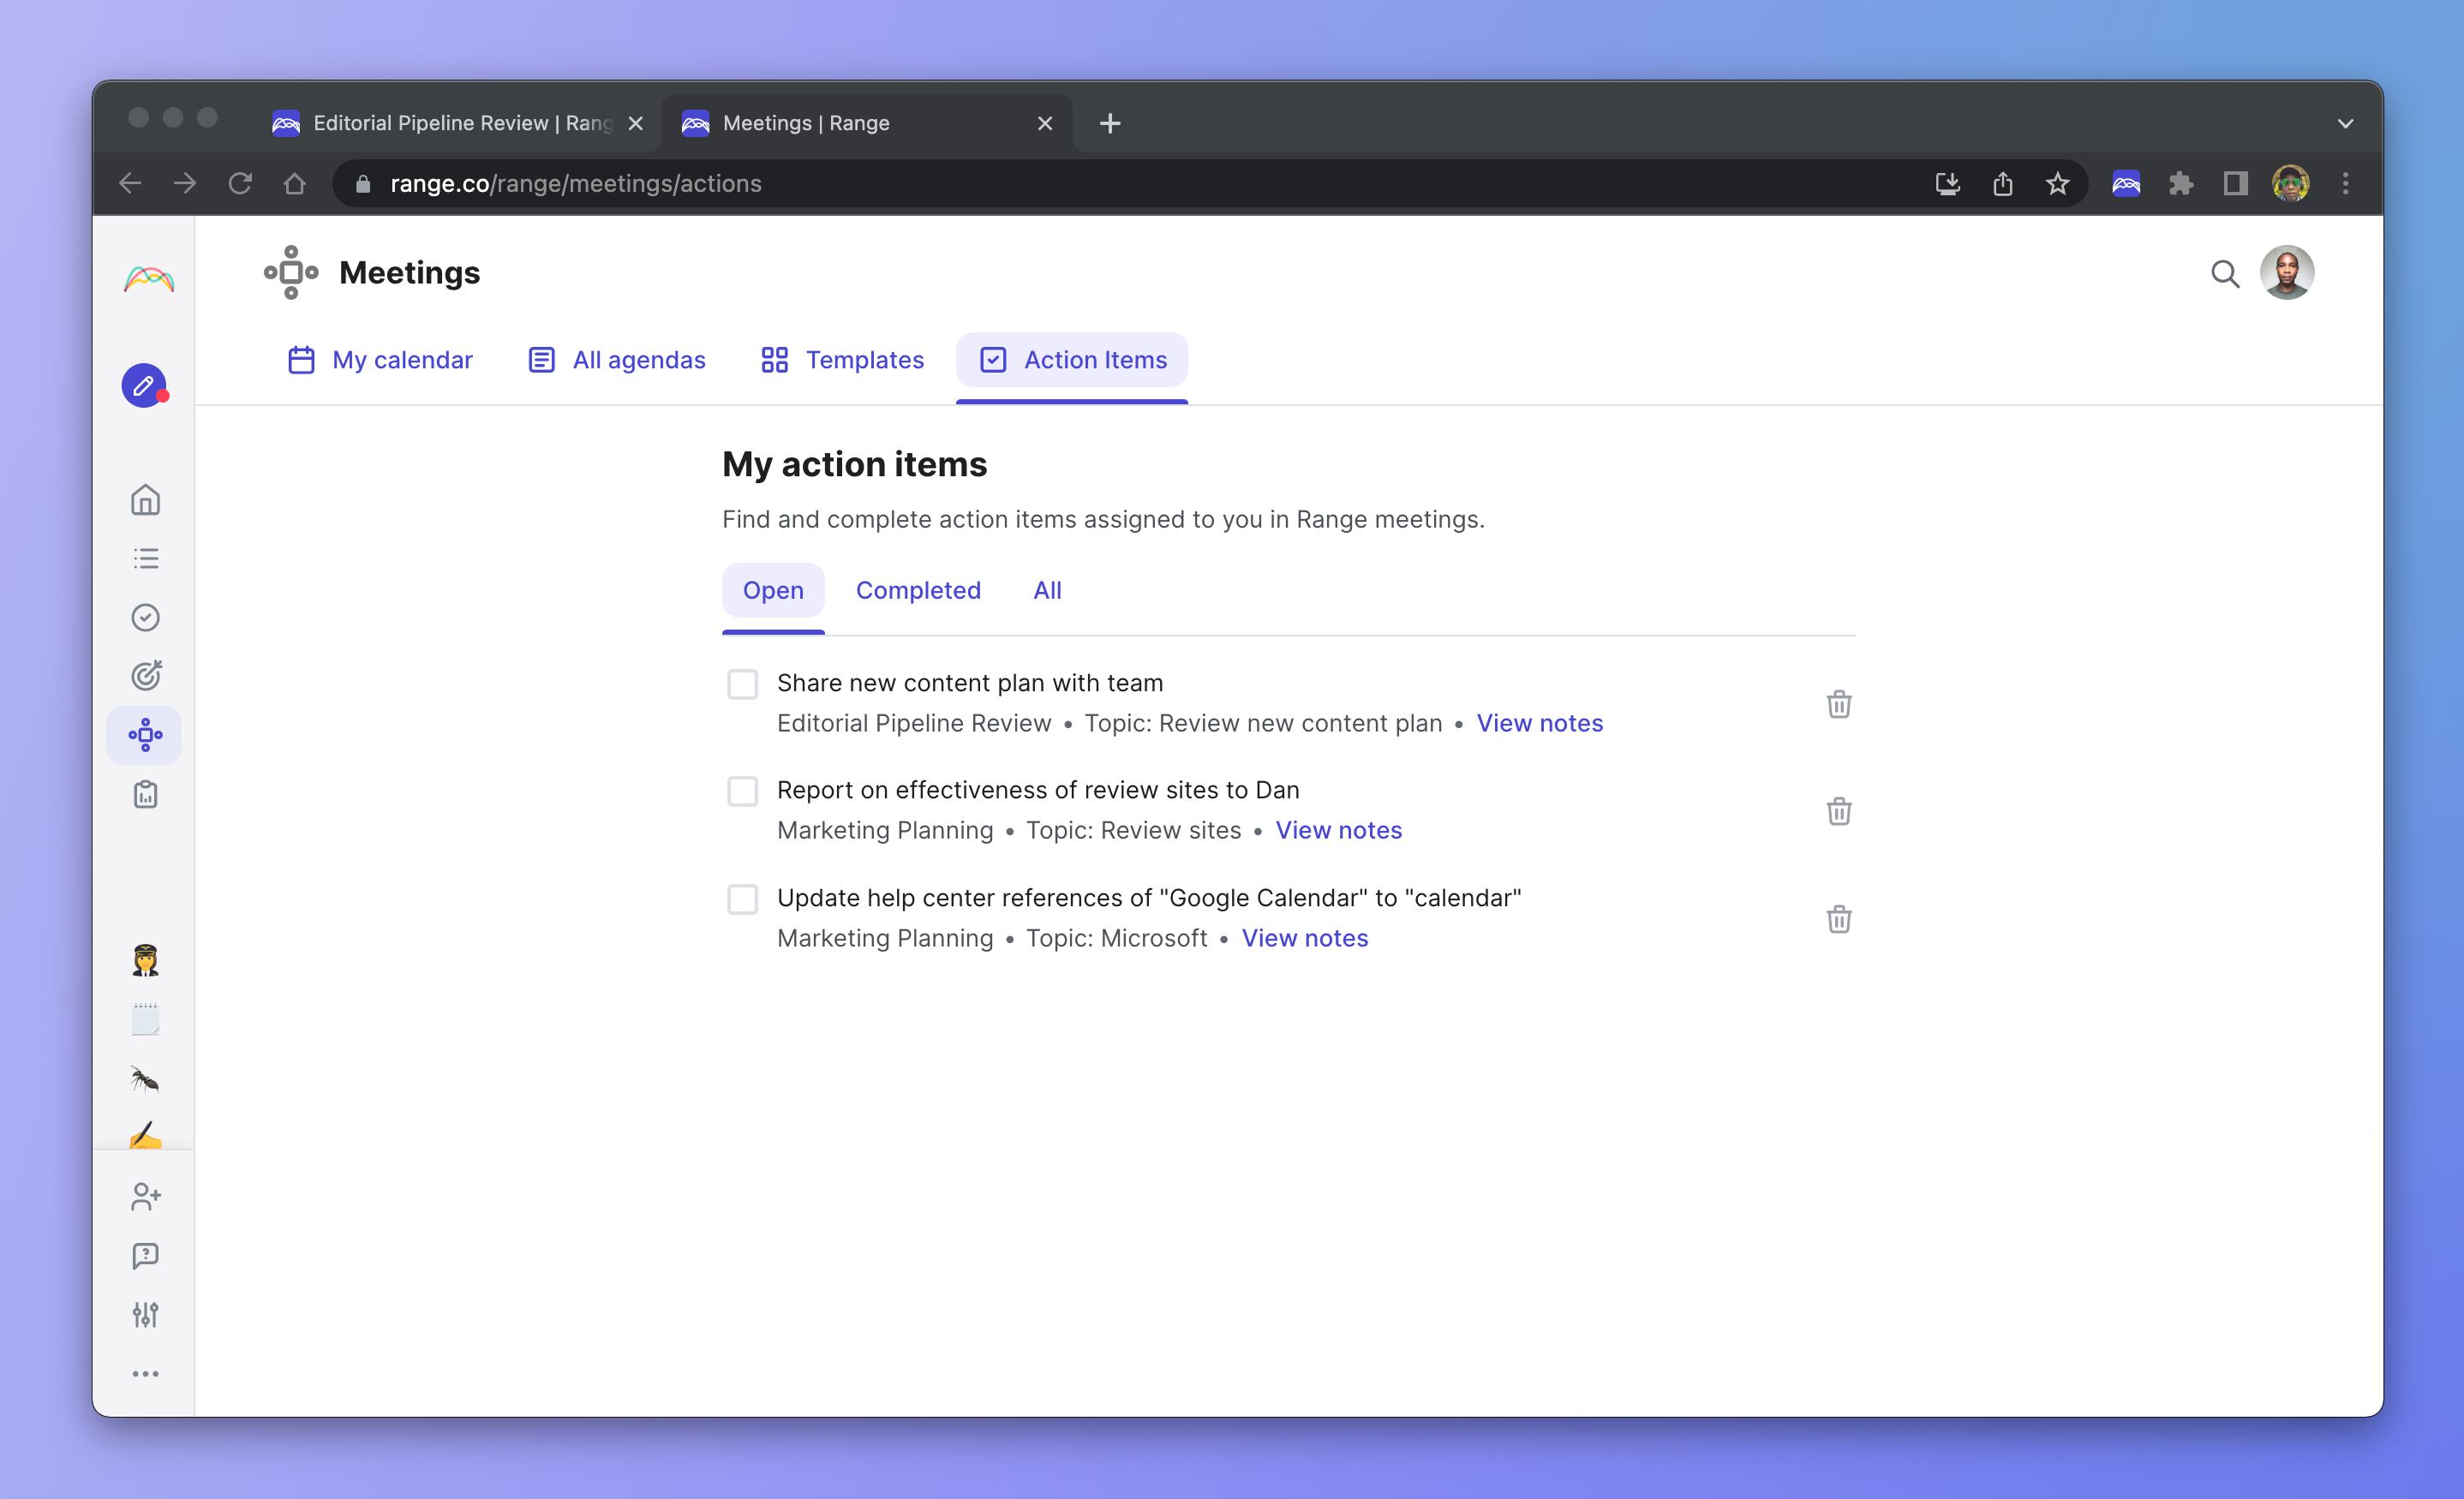
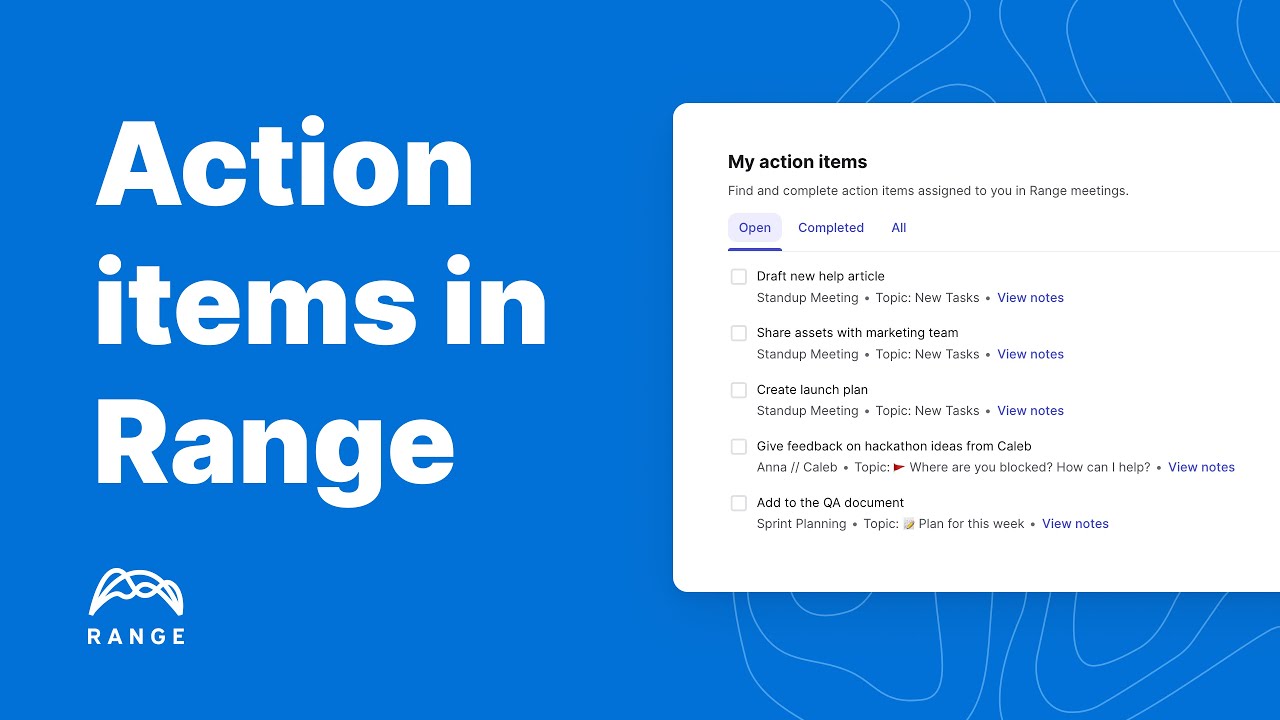
After your meeting ends, action items will appear in the meeting notes that Range automatically sends out to the whole team. Additionally, you and your teammates will be able to review all of your assigned action items both in your Meeting dashboard under “Action Items” and in your Check-ins sidebar while you’re composing your Check-ins.
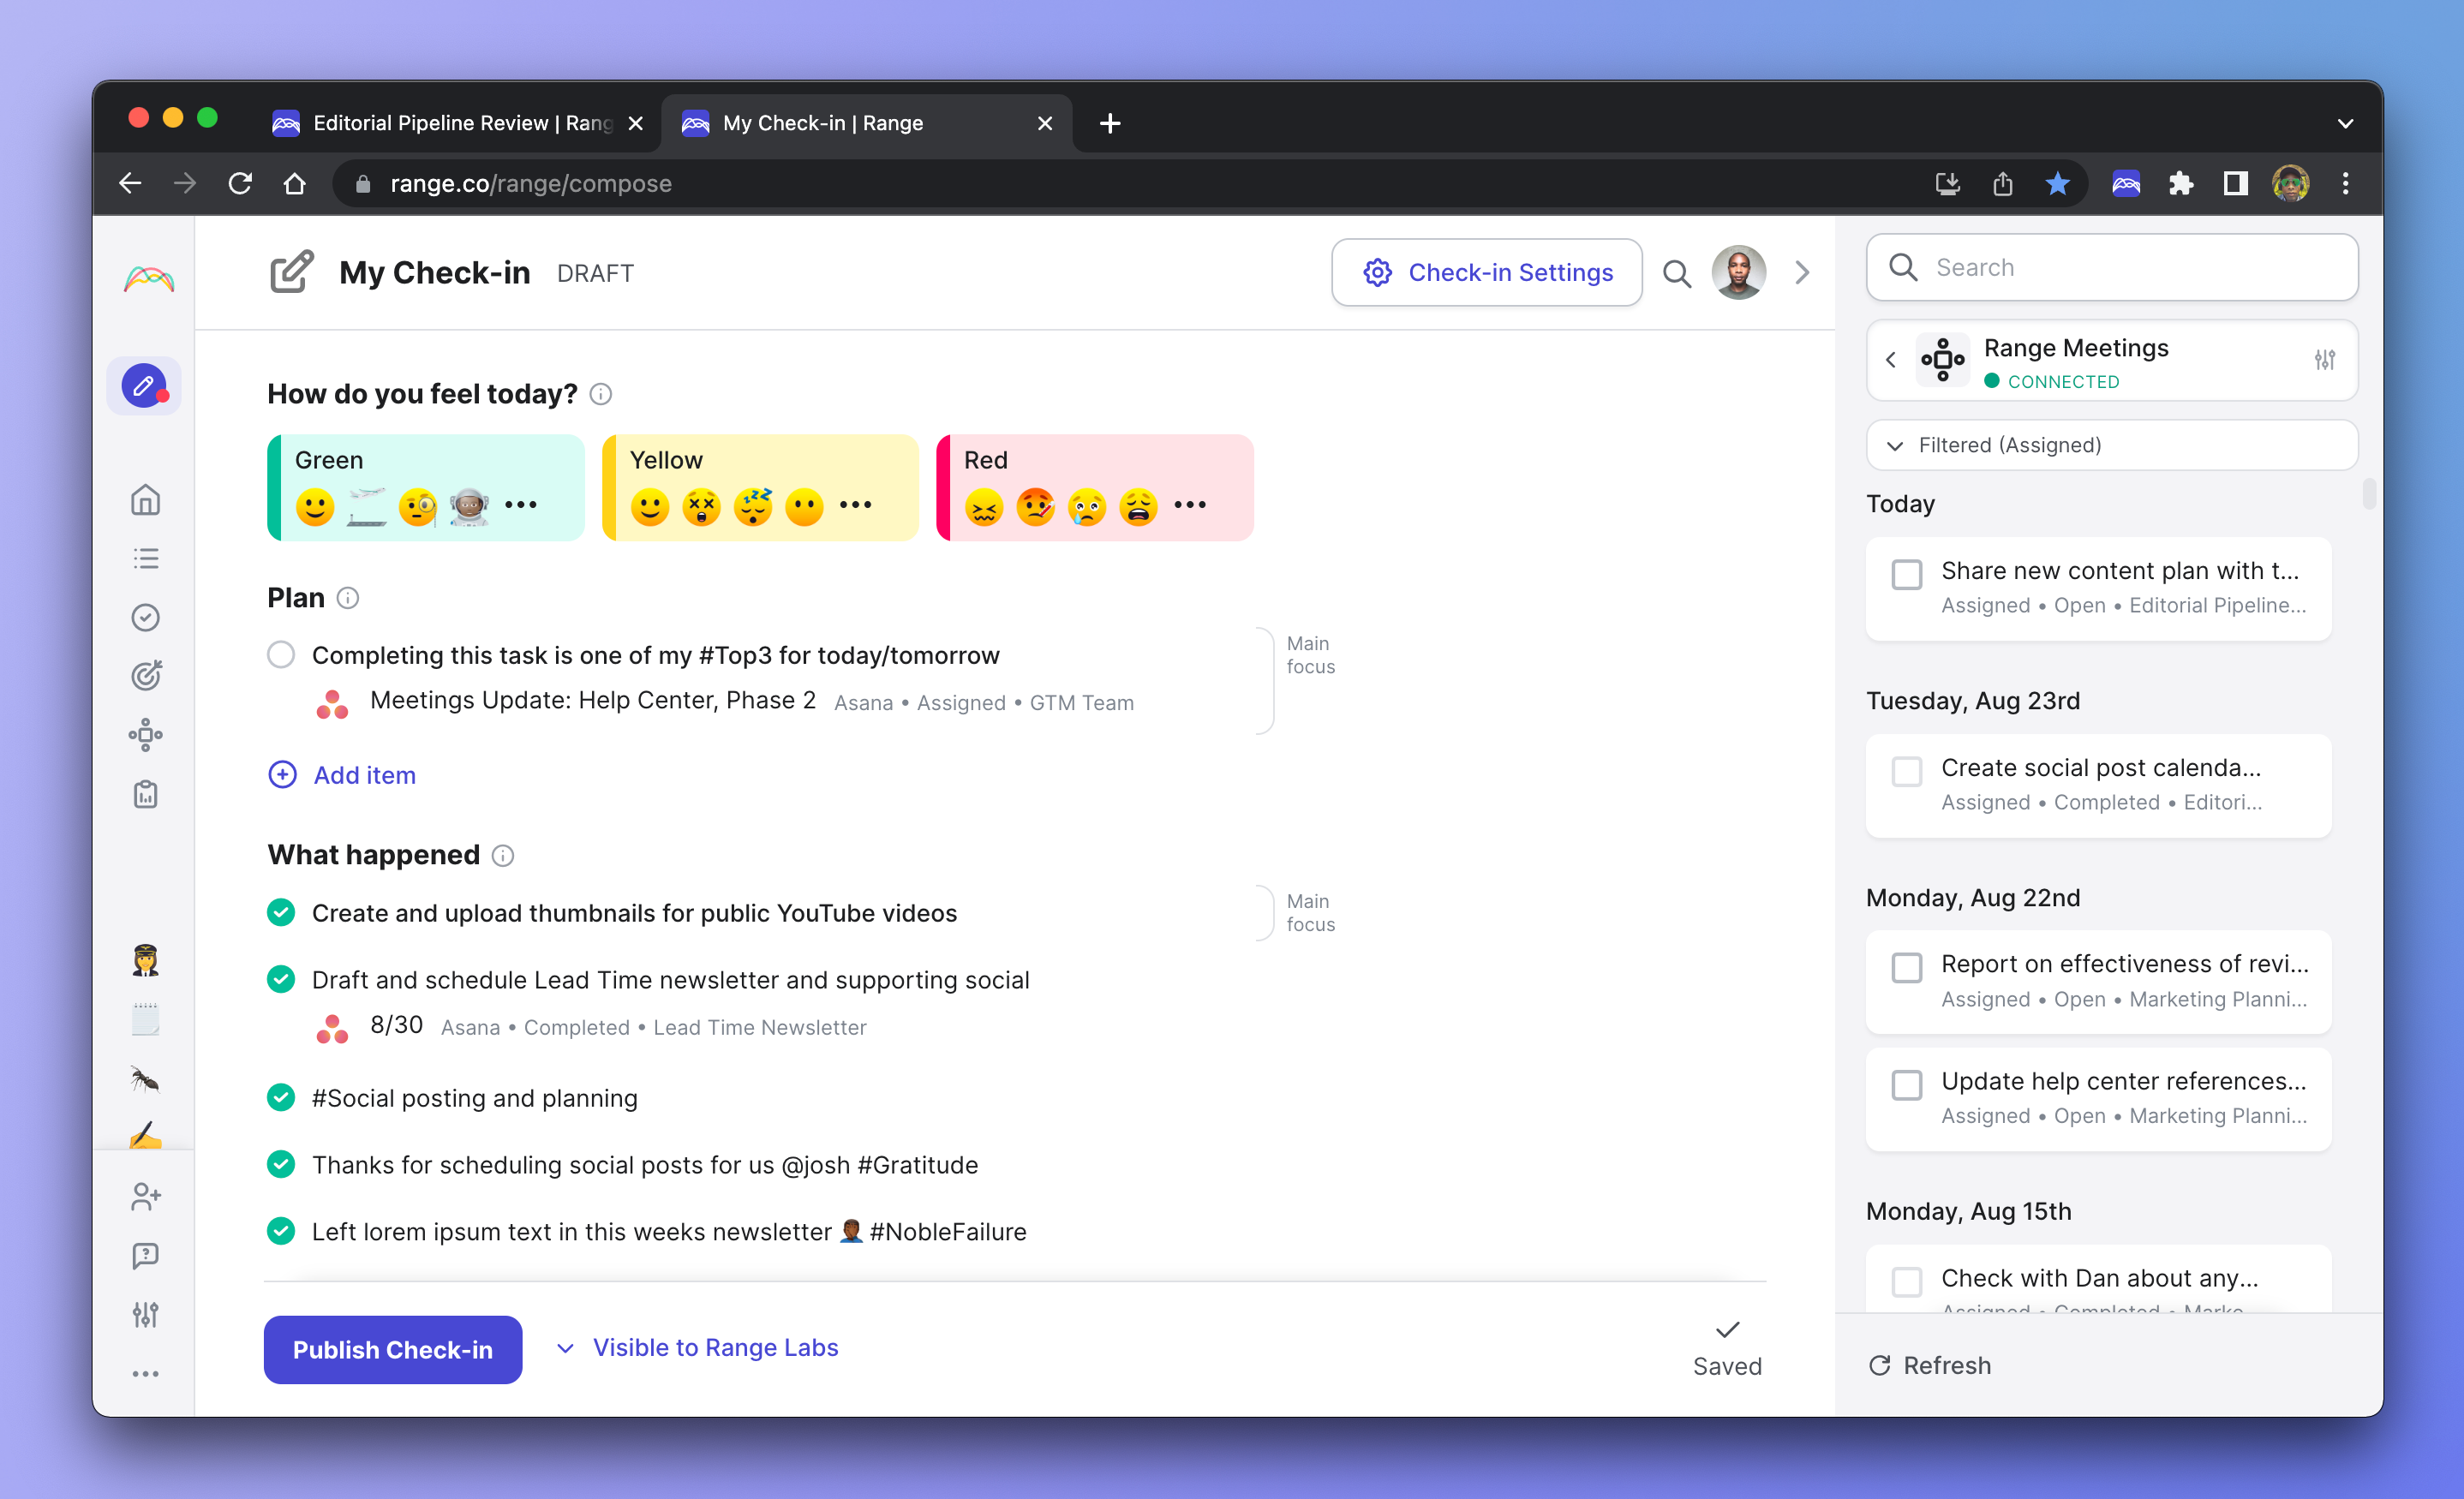
When you’re ready to work on an action item assigned to you during a meeting, add it to the “Plan” section of your Check-in by dragging and dropping it from your activity sidebar. If you don’t see a particular action item there, you can pull up all your open action items by clicking on the Range Meetings icon.
If you’ve added an action item to your plan and move it to the “What Happened” section of your Check-in, Range will automatically mark the task as completed in the corresponding meeting agenda.